Monday, March 11, 2024

TEC DATA DOES NOT COVER FULL RANGE OF CL TABLE

Check your listr and if the data are observed more than one day you need to download the IONEX files at least 2 files and put in the same folder.

 >inp
AIPS 1: VLBATECR  Procedure to calibrate ionospheric delay
AIPS 1: Adverbs     Values                 Comments
AIPS 1: ----------------------------------------------------------------
AIPS 1: INNAME     'project name'                Input UV file name (name)
AIPS 1: INCLASS    'UVDATA'                Input UV file name (class)
AIPS 1: INSEQ         1                    Input UV file name (seq. #)
AIPS 1: INDISK        1                    Input UV file disk unit #
AIPS 1: SUBARR        0                    Subarray to correct
AIPS 1:                                      (0 => all)
AIPS 1: TECRFILE   *all ' '                IONEX file name
AIPS 1:                                    '' => download autmatically
AIPS 1: TECRTYPE   ' '                     type of IONEX file to
AIPS 1:                                    download  ' ' -> 'jplg'
AIPS 1: NFILES        0                    # of TECRFILES
AIPS 1: APARM      *all 0                  Switches
AIPS 1:                                    APARM(1)=1 forced to do the
AIPS 1:                                    dispersive delay
AIPS 1:                                      (2) Follow ionosphere
AIPS 1:                                          factor
AIPS 1:                                      (3) > 0 use IGRFv13 for
AIPS 1:                                          Earth magnetic field
AIPS 1:                                      (4) TEC correction factor
AIPS 1:                                          default 1.
AIPS 1:                                      (5) TEC elevation increment
AIPS 1:                                          (km) default 0
AIPS 1:                                      (6) TEC elevation fudge
AIPS 1:                                          factor, default 1
AIPS 1:            VLBATECR is defined in the VLBAUTIL run file.
>vlbatecr

tecrfile = put only the first date observation file

nfiles= numbers of your IONEX files 

Enjoy!
#######################################

The data of IONEX can be downloaded here https://cddis.nasa.gov/archive/gnss/products/ionex/.
Friday, February 23, 2024

trouble shooting with FILAIP into Fedora39

After installation of the AIPS and you have found the problem that ......LOAD/FILAIP.EXE: error while loading shared libraries: libtinfo.so.5: cannot open shared object file: No such file or directory 

Solution: you need to install libncurses5 into the Fedora39; need a root or admin to do this task

dnf install ncurses-compat-libs.x86_64

You will also have to RUN POPSGN if that works; 

Feed it with this sentence 

0 POPSDAT TST 

when it asks for Idebug, etc. and press RETURN when you see the '>' prompt. 

 Now enjoy with the AIPS :-)

 P.S.About to run FILAIP.  If this is a re-installation, you will be prompted for an AIPS Manager password.  The default password is AMANAGER.

Wednesday, October 25, 2023

ถ้าย้ายเครื่อง ก็ต้องย้ายโฟลเดอร์ไปด้วยเช่นกัน aips data folder issue (solved)

ในกรณีทำ virtual machine ลิงค์ดาต้าจากเครื่องอื่น ให้ก็อปปี้ดาต้ามาที่โฟลเดอร์ใหม่ด้วยเช่นกัน เช่น /lustre/NRA/aips/DA00/ชื่อโฟลเดอร์ดาต้าของเครื่องใหม่หรือ virtual machine cp -r folderเก่าที่มีดาต้าเดิม folderใหม่ที่ต้องการหรือของเครื่องvirtual machine

Friday, October 20, 2023

test latex equation in the blogger

<html>
<head>  
 <script async="" src="https://cdnjs.cloudflare.com/ajax/libs/mathjax/2.7.4/MathJax.js?config=TeX-MML-AM_CHTML" type="text/javascript">
 </script>
</head>
<body>
<font size="3" face="times" color="black">

\[ \vec{A}  = 5\hat{x} + 4\hat{y}   \]

</font>
</body>
</html>
\[ \vec{A} = 5\hat{x} + 4\hat{y} \]

How to connect an external harddisk with AIPS? การเซ็ทดิสก์ภายนอกให้อ่านและเซฟข้อมูลให้กับ aips

 เนื้อความเอกสาร คัดลอกและปรับแต่งจาก https://texco.exblog.jp/21697794/ ขอขอบคุณมา ณ ที่นี้

ปัญหาสำหรับข้อมูลด้านดาราศาสตร์วิทยุคือ มีปริมาณมหาศาลในแต่ละไฟล์ ดังนั้น เราจึงขยายขนาดการจัดเก็บพื้นที่ไปที่ external harddisk โดยการทำดังนี้ 

1) สร้างพื้นที่โฟลเดอร์จัดเก็บใน external harddisk ไว้รอ ใช้ชื่ออะไรก็ได้ ในที่นี้ใช้ชื่อว่า LOCALHOST_2 จะได้สอดคล้องกับข้อมูลที่จัดเก็บใน aips หรือ LOCALHOST_1

/Volumes/My_Passport/LOCALHOST_2

2) สร้างพื้นที่ว่างเปล่าชื่อว่า SPACE ไว้ใน LOCALHOST_2

 touch SPACE

3) ให้สร้าง symbol link จาก external harddisk ไปยังไดรฟ์ DATA ของ aips
%cd  DATA (เข้าไปที่ DATA ของ aips ก่อน)

 % ls  (ลิสต์ดูว่ามีข้อมูลอะไรบ้าง)

LOCALHOST_1

ln -s /Volumes/My_Passport/LOCALHOST_2 LOCALHOST_2 => สร้าง symbol link จาก external harddisk ไปยัง DATA ของ aips

% ls -n

total 0

drwxrwsr-x  7567 501  20  242144 Oct  2 17:58 LOCALHOST_1

lrwxr-xr-x     1 501  20      32 Oct 20 13:37 LOCALHOST_2 -> /Volumes/My_Passport/LOCALHOST_2 จะมีเครื่องหมายลูกศรกำกับ บอกว่าเวลาเรียกหาโฟลเดอร์ LOCALHOST_2 มันจะวิ่งไปหาที่ external harddisk ด้วยชื่อนี้


4) แก้ไขไฟล์ DADEVS.LIST และ NETSP ใน aips

% cd ../DA00

DA00 % ls

DADEVS.LIST NETSP TPDEVS.LIST

LOCALHOST PRDEVS.LIST TPHOSTS


ใช้ซอฟแวร์อะไรก็ได้แก้ไขไฟล์ DADEVS.LIST เพื่อบอกโปรแกรม aips ว่าเราสร้างโฟลเดอร์ LOCALHOST_2 ไว้แล้วใน DA00


DADEVS.LIST
#-----------------------------------------------------------------------
#-----------------------------------------------------------------------
#; Copyright (C) 1995
#; Associated Universities, Inc. Washington DC, USA.
#;
#; This program is free software; you can redistribute it and/or
#; modify it under the terms of the GNU General Public License as
#; published by the Free Software Foundation; either version 2 of
#; the License, or (at your option) any later version.
#;
#; This program is distributed in the hope that it will be useful,
#; but WITHOUT ANY WARRANTY; without even the implied warranty of
#; MERCHANTABILITY or FITNESS FOR A PARTICULAR PURPOSE. See the
#; GNU General Public License for more details.
#;
#; You should have received a copy of the GNU General Public
#; License along with this program; if not, write to the Free
#; Software Foundation, Inc., 675 Massachusetts Ave, Cambridge,
#; MA 02139, USA.
#;
#; Correspondence concerning AIPS should be addressed as follows:
#; Internet email: aipsmail@nrao.edu.
#; Postal address: AIPS Project Office
#; National Radio Astronomy Observatory
#; 520 Edgemont Road
#; Charlottesville, VA 22903-2475 USA
#-----------------------------------------------------------------------
# DADEVS.LIST
#-----------------------------------------------------------------------
# This is a DADEVS list file containing a list of AIPS data directories.
# Refer to $AIPS_ROOT/DADEVS.SH for more information.
#-----------------------------------------------------------------------
/Users/narit/aips/DATA/LOCALHOST_1

/Users/narit/aips/DATA/LOCALHOST_2


ใช้ซอฟแวร์อะไรก็ได้แก้ไขไฟล์ NETSP เพื่อบอกโปรแกรม aips ว่าเราให้สิทธิ์โฟลเดอร์ LOCALHOST_2 ใน DA00 จัดเก็บข้อมูลทั้งปี

NETSP
#-----------------------------------------------------------------------
#; Copyright (C) 1995
#; Associated Universities, Inc. Washington DC, USA.
#;
#; This program is free software; you can redistribute it and/or
#; modify it under the terms of the GNU General Public License as
#; published by the Free Software Foundation; either version 2 of
#; the License, or (at your option) any later version.
#;
#; This program is distributed in the hope that it will be useful,
#; but WITHOUT ANY WARRANTY; without even the implied warranty of
#; MERCHANTABILITY or FITNESS FOR A PARTICULAR PURPOSE. See the
#; GNU General Public License for more details.
#;
#; You should have received a copy of the GNU General Public
#; License along with this program; if not, write to the Free
#; Software Foundation, Inc., 675 Massachusetts Ave, Cambridge,
#; MA 02139, USA.
#;
#; Correspondence concerning AIPS should be addressed as follows:
#; Internet email: aipsmail@nrao.edu.
#; Postal address: AIPS Project Office
#; National Radio Astronomy Observatory
#; 520 Edgemont Road
#; Charlottesville, VA 22903-2475 USA
#-----------------------------------------------------------------------
# NETSP contains network-wide AIPS system parameter definitions.
#-----------------------------------------------------------------------
#
# ZDCHIN will look for this file in $NET0 if it succeeds in translating
# logical NVOL, indicating that the AIPS network data disk allocation
# facility is in use. The system is implemented via the DADEVS.SH
# and optional DADEVS.PL perl script which defines NVOL, and DA0[1-Z].
#
# ZDCHIN interprets each entry as
# 1) location of the data disk (translated value of DA0[1-F])
# e.g. /DATA/ATELES_3
# 2) the TIMDEST limit for the disk, in days
# e.g. 7.0
# 3) eight AIPS booking system user numbers (-1 in first => scratch)
# e.g. 1 29 0 0 0 0 0 0
#
# When editing this file, DO NOT USE THE TAB KEY OR INSERT ANY TABS!
# (the tab is usually control-I). The "white space" between parameters
# MUST be comprised of nothing but spaces. Also, make sure the last
# line includes a newline, otherwise that data area will not be counted.
#-----------------------------------------------------------------------
# Disk name TIMDEST --------------Allowed Users-----------
/Users/narit/aips/DATA/LOCALHOST_1 365.0 0 0 0 0 0 0 0 0
/Users/narit/aips/DATA/LOCALHOST_2 365.0 0 0 0 0 0 0 0 0


5) เปลี่ยนสิทธิ์การเป็นเจ้าของเพื่อการอ่านและบันทึกไฟล์ใน external disk โดยให้สิทธิ์ user ชื่อ narit, group:staff ใช้งานได้ใน external harddisk
$ chown -R [user name] /Volumes/KAGOSHIMA/Takeaki-Ozawa
$ chgrp -R [grp name] /Volumes/KAGOSHIMA/Takeaki-Ozawa
ในที่นี่เปลี่ยนเป็น 

% chown -R narit /Volumes/My_Passport/LOCALHOST_2

% chgrp -R staff /Volumes/My_Passport/LOCALHOST_2


-R option หมายถึง มีสิทธิ์แก้ไขภายในโฟลเดอร์นั้น ๆ 

เวลาใช้งานใน aips ให้เขียนว่า 

ind 1 => LOCALHOST_1

ind 2 => LOCALHOST_2


outd 1, outd 2 ก็จะเซฟข้อมูลตามกำหนดนั่นเอง 

แต่ถ้าจะดู disk ทั้งหมดกำหนดเป็น ind 0 ก็จะลิสต์ทั้งหมดมาให้


หมายเหตุ สำหรับการใช้ NTFS ไฟล์แบบใหม่นี้ จำต้องให้ Mac apple M1 ขึ้นไป (หรือ M2) หรือแม้แต่ Linux sytem รู้จักก่อน ซึ่งต้องติดตั้งไฟล์พิเศษเพื่ออ่านและเขียน โดยเฉพาะ ผู้ใช้งานเลือกใช้ iBoysoft NTFS เพราะว่าใช้งานได้ง่ายดีคะ

Wednesday, November 24, 2021

การแก้ปัญหา AIPS works, tekserver works, but the TV doesn't come up กรณี depth plane ของเครื่องต้นทางและปลายทางต่างกัน

 สวัสดีค่ะ 

กลับมาอีกครั้งกับการอัพเดทของคอมพิวเตอร์ที่ห่างหายไปนาน 

มาเที่ยวนี้ มาแก้ไขปัญหา AIPS works, tekserver works, but the TV doesn't come up กรณี depth plane ของเครื่องต้นทางและปลายทางต่างกัน

ปัญหา ด้วยว่า aips ถูกออกแบบให้ใช้กราฟฟิกจำนวนบิตต่ำ นั่นก็คือ 8 หรือ 24 บิตไปเลย ดังนั้น เครื่องคอมพ์สมัยใหม่ ใช้แบบนี้ไม่ได้ จึงต้องมัดมือชก โดยการบังคับให้เครื่องปลายทางที่เรียกใช้งานเป็น 24 บิตไปเลย 

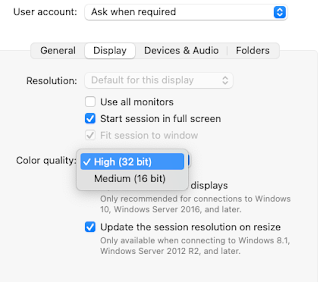
ก่อนอื่นทดสอบ เครื่องของปลายทางว่ากี่บิต ใช้คำสั่ง  xdpyinfo | more ถ้าเจอว่า depth 16 planes แบบนี้ ไม่สามารถแสดง tvserver ได้ ต้องให้ root แก้ไข depth ให้เป็น 24 planes จึงจะใช้ได้ หรือบังคับให้เครื่องต้นทาง (คือเครื่องที่เราจะ  access ใช้งาน) ให้แสดงผลเป็น 24 planes เช่นกัน ยกตัวอย่างเช่น การใช้ซอฟแวร์ Remote desktop windows นี้ เป็นต้น (ปล.เนื่องจาก os Monterley ยังมี config ค่อนข้างมากกับซอฟแวร์นี้ จึงต้อง force ให้เครื่องปลายทาง ใช้ 24 planes ไปเลย ดังนั้น ในนี้ไม่แสดงผล 24 bits นะค่ะ) 


This is seen most often on Linux systems. Almost certainly your X Windows configuration is set to use a 16-bit display. The AIPS TV can only support 8 and 24 bit displays (32 and 24 should be equivalent). Type "xdpyinfo | more" and if you see this:

      
        default visual id:  0x20
        visual:
          visual id:    0x20
          class:    TrueColor
          depth:    16 planes
      

... then this is the problem. If it says 8 or 24, then the TV should work. If it says 16, then you should alter your X configuration to allow either 8 or 24 bit display. You should use the supplied tools, e.g. XConfigurator under Red Hat Linux, to do this; only edit the XF86Config file directly if you know exactly what you're doing!

Saturday, March 31, 2018

Latex tricks for Thesis

Welcome back to write a blog again, such a long time indeed. Here I record a memo tricks for using Latex software. I also work on THESIS TEMPLATE for awhile. Please feel free to use and adapt it if does not work properly. I will explain in Thai words for Thai people who are using Latex too.

\usepackage{indentfirst}%บังคับให้เยื้องแรกในพารากราฟ
\setlength{\parindent}{4em}%พารากราฟเยื้องขนาด 4em (please see explain unit as shown below)

\usepackage{setspace}%ใช้แพ็กเกจนี้ควบคู่กับการทำให้บรรทัดกว้าง 1.5 เท่าของบรรทัดปกติ
\setstretch{1.5} % เหมาะสำหรับ times new roman font เท่านั้น

\usepackage{titlesec}%แพ็กเกจเรียกใช้  title section
\setcounter{secnumdepth}{4}%ให้มันนับถึง subsubsection i.e. 4.2.1.2  โดยเฉพาะใน report&book
\titlespacing\section{0pt}{0pt plus 1pt minus 1pt}{0pt plus 1pt minus 1pt}%การกำหนดลักษณะของระยะห่าง(หรือที่ว่าง) จากหัวข้อ ไทเทิลมาที่พารากราฟของแต่ละอันเช่นใน  section, subsection & subsubsection
\titlespacing\subsection{40pt}{0pt plus 1pt minus 1pt}{0pt plus 1pt minus 1pt}
\titlespacing\subsubsection{80pt}{0pt plus 1pt minus 1pt}{0pt plus 1pt minus 1pt}

\hspace{4em} % กำหนดระยะในแนวนอน เนื่องจากยังหา indent ใน subsection & subsubsection ไม่ได้จึงกำหนดระยะตามแนวนอนแบบนี้แทน และป้องกันการ wrap text ในพารากราฟนั้นๆ

**วิธีการกำหนดค่า titlespacing\สั่งไปที่ไหน{ห่างจากกระดาษด้านซ้ายเท่าใด}{ระยะห่างต่อจาก last paragraph}{ระยะห่างจากบรรทัดสุดท้ายไปยังหัวข้อถัดไป}

Here below is the codes which I have been tried and sound works! Let's enjoy. P.S. Please ignore chapter number at the moment, I have just tested indent and spacing during the title and paragraph.

\documentclass[twopage]{book}
\usepackage{lipsum}%just for typing
\usepackage{geometry}
\usepackage{indentfirst}
\setlength{\parindent}{4em}
\usepackage{setspace}
\setstretch{1.5}
\usepackage{titlesec}
\setcounter{secnumdepth}{4}
\titlespacing\section{0pt}{0pt plus 1pt minus 1pt}{0pt plus 1pt minus 1pt}
\titlespacing\subsection{40pt}{0pt plus 1pt minus 1pt}{0pt plus 1pt minus 1pt}
\titlespacing\subsubsection{80pt}{0pt plus 1pt minus 1pt}{0pt plus 1pt minus 1pt}
\begin{document}
\section{Section}
\lipsum[1]
\subsection{Intro}
\hspace{4em}\lipsum[2]
\subsubsection{Honey}
 \hspace{8em}\lipsum[3]
\section{Test wa}
\lipsum[4]
\subsection{Intro}
\indent \lipsum[2]
\lipsum[3]
\lipsum[4]
\subsubsection{Honey}
 \lipsum[3]
\end{document}

Friday, August 4, 2017

Install pip and virtualenv for Ubuntu 10.10 Maverick and newer

Install pip and virtualenv for Ubuntu 10.10 Maverick and newer

$ sudo apt-get install python-pip python-dev build-essential
$ sudo pip install --upgrade pip
$ sudo pip install --upgrade virtualenv

Scipy package
Installing via pip
Mac and Linux users can install pre-built binary packages for the SciPy stack using pip. Pip can install pre-built binary packages in the wheel package format.

Note that you need to have Python and pip already installed on your system.

pip does not work well for Windows because the standard pip package index site, PyPI, does not yet have Windows wheels for some packages, such as SciPy.

To install via pip on Mac or Linux, first upgrade pip to the latest version:

python -m pip install --upgrade pip
Then install the SciPy stack packages with pip. We recommend a user install, using the --user flag to pip (note: don’t use sudo pip, that will give problems). This installs packages for your local user, and does not need extra permissions to write to the system directories:

pip install --user numpy scipy matplotlib ipython jupyter pandas sympy nose
For user installs, make sure your user install executable directory is on your PATH. Here are example commands for setting the user PATH:

Linux:

# Consider adding this at the end of your ~/.bashrc file
export PATH="$PATH:/home/your_user/.local/bin"

Monday, November 28, 2016

unlock WD Passport on Linux Ubuntu 16.04

This link contains software to unlock and manage WD passport external hard disk.

GitHub - 0-duke/wdpassport-utils: WD Passport Ultra Linux Utilities

mounting EXFAT for Ubuntu 16.04

How to Mount EXFAT partition on Ubuntu 16.04 LTS

To mount exfat partition on Ubuntu, simply install the necessary packages:
$ sudo apt-get install exfat-fuse exfat-utils

If you need to mount it from the command line, you could do
$ sudo mkdir /media/exfat (or specific path)
$ sudo mount -t exfat /dev/sdxx /media/exfat
where /dev/sdxx could be /dev/sda1 or /dev/sda2, or so on.

If you are not sure whether the exfat partition you are looking for is /dev/sda1 or /dev/sda2, then you could also run
$ sudo lsblk -o NAME,FSTYPE,SIZE,MOUNTPOINT,LABEL
This should do it!

Credit from http://unixnme.blogspot.com.au/2016/04/how-to-mount-exfat-partition-in-ubuntu.html. Thanks :D

Tuesday, June 23, 2015

Ureka installation and using IRAF

วันนี้พบว่า ลงแบบ stand alone ยังมีเว็ทค่าผิดพลาด จึงตัดสินใจ ลงด้วย Ureka ดังนี้

Quick Installation

  1. Download the installer for the current version of Ureka to the desired install location (right-click and Save Link As...):
    http://ssb.stsci.edu/ureka/1.5.1/install_ureka_1.5.1
    -OR-
    copy/paste one of these commands into a terminal window to download the installer:
    wget http://ssb.stsci.edu/ureka/1.5.1/install_ureka_1.5.1
    
    curl -O http://ssb.stsci.edu/ureka/1.5.1/install_ureka_1.5.1
    
    (Both commands do the same thing. It is often the case that Linux has wget and Macintosh has curl)
  2. Run the installer:
    sh ./install_ureka_1.5.1
    
  3. The installer will ask you to enter an installation name and will ask for permission to edit your login scripts.
     
หลังจากนั้นรัน ur_setup ก่อน โดยเปิดใน terminal ใหม่ เมื่อเซ็ทหรือปรับค่าเสร็จแล้ว ทำการตรวจสอบระบบโดยพิมพ์คำว่า
ur_test
The ur_test script will run a series of tests, and provide a summary of how many tests passed and failed.
If there were failures, a more detailed log will be produced.
Here is an example of output from a ur_test run in which one error and one failure occurred.
Your operating system supports 32-bit executables.
Running tests... pass=77 fail=0 error=0
 ถ้าเป็นแบบนี้แสดงว่าลงระบบผ่านทั้งหมด ทั้งนี้จะติดตั้งเร็วหรือช้าขึ้นอยู่กับอินเตอร์เน็ตของเราว่าดีขนาดไหนนะค่ะ เวลาจะเรียกใช้ IRAF ให้สั่ง mkiraf เพื่อตั้งค่า เลือก xgterm หรือ xterm เพราะ IRAF ทำงานได้ดีใน terminal ประเภทพวกนี้ (คือสร้างสคริปต์ไฟล์ login.cl ขึ้นมาให้เรียกใช้งาน) จากนั้นพิมพ์ในเทอร์มินัล นั้น ๆ ว่า .......cl......ก็เป็นอันว่าใช้งานได้แล้วค่ะ

Monday, June 22, 2015

การติดตั้ง IRAF บนลีนุกซ์ อีกครั้ง....(IRAF installation for Linux machine again&again)

package IRAF ที่ใช้ติดตั้งบนลีนุกซ์ได้ สามารถหาหรือ download ได้จาก 3 รูปแบบดังนี้

1) Scisoft  (http://www.eso.org/sci/software/scisoft/) เป็นชุดเครื่องมือใช้สำหรับการสังเกตการณ์ของ European Southern Observatory (ESO) หนึ่งใน packages ที่ใช้งานก็คือ IRAF  ซึ่งจะต้องติดตั้ง Scisoft ให้เสร็จก่อน .....เวอร์ชั่นปัจจุบันของ scisoft คือ  Scisoft8.0 (Dec. 2014; work on fedora core 20)  ถ้าต้องการไฟล์ ต้องติดต่อเจ้าหน้าที่เพื่อดาวน์โหลดโดยเฉพาะ.... เพราะฉะนั้น version 7.7 จึงเหมาะสำหรับการใช้งานในปัจจุบัน สามารถโหลดได้จากเว็บ FTP   ftp://ftp.eso.org/scisoft/scisoft7.7/linux/fedora11/
ขั้นตอนการติดตั้งมี 2 แบบหลัก ๆ คือจะใช้ Yum หรือ rpm ก็ได้ .....เนื่องจาก Scisoft ถูกออกแบบมาใช้สำหรับ Fedora linux เท่านั้น หากใครใช้ Ubuntu ต้องเข้าไปอ่านวิธีการติดตั้งจากกระทู้ก่อนหน้านี้ แต่ถ้าใช้ centos หรือ suse ก็แนะนำว่าติดตั้งแบบ rpm จะดีที่สุด 
ขั้นตอนที่แปะนี้ สำหรับติดตั้งแบบ yum และ rpm เท่านั้น


Method #1 Installing from the online yum repository
---------------------------------------------------

Pros:

        *  your Scisoft installation can automatically be kept
           aligned with the latest available bugfixes for this Scisoft
           release
        
        *  you can install all of Scisoft or only the parts you
           want

Cons:

        *  requires Fedora Core 20

Procedure:

        1) If you have a previous installation of Scisoft then back 
           it up and remove it using a method appropriate to it was
           installed (e.g. if you used 'yum' to install it now use
           'yum' to remove it).

        2) As root create /etc/yum.repos.d/scisoft.repo containing:

           [scisoft]
           name=Scisoft
           baseurl=ftp://ftp.eso.org/scisoft/scisoft8/linux/fedora/20/x86_64
           gpgcheck=0
           enabled=1

        3) As root run:

           yum clean all
           yum install scisoft8-\*

           and when prompted, check the list of packages about to
           be installed looks sensible, and then allow yum to start
           installing the packages by pressing 'y'.

Method #2 Installing from RPMs 
------------------------------

Pros:

        *  you can install all of Scisoft or only the parts you
           want

Cons:

        *  requires Fedora Core 20, or that some dependencies are
           overridden using rpm's '--nodeps' option

Procedure:

        1) Download all RPMs at
           ftp://ftp.eso.org/scisoft/scisoft8/linux/fedora/20/x86_64/,
           or copy them from the Scisoft DVD
           and save them to a directory, which we will call
           <scisoft-save-dir>.

        2) If you have a previous installation of Scisoft then back 
           it up and remove it using a method appropriate to it was
           installed (e.g. if you used 'yum' to install it now use
           'yum' to remove it).

        3) As root, run:

           rpm -ihv <scisoft-save-dir>/*.rpm

----------------------------------------------------------------------------
2) Ureka  เป็นที่ ๆ รวบรวมซอฟแวร์ทางด้านดาราศาสตร์ท้ศนศาสตร์ เวอร์ชั่นปัจจุบัน น่าจะเป็น 1.5.1 ถ้าต้องการติดตั้งซอฟแวร์นี้ จะใช้เซิร์ฟเวอร์ปลายทางในการแตกไฟล์และติดตั้งบนเครื่องคอมพ์ที่อยู่ต้นทาง เพราะฉะนั้นอาจใช้เวลานานพอสมควร  ขั้นตอนการติดตั้งตามด้านล่างนี้

To install Ureka on a Mac or Linux:

  • Choose an installation directory and download this installer (right-click on the link and select Save Link As...) to that location.
  • Run the installer by typing 
    sh install_ureka_1.5.1
  • The installer will ask for permission to edit your login scripts. If you have more than one Ureka installation, the installer will also ask you to provide an installation name.
  • If this is your first time installing Ureka, you will need to start a new terminal window for the changes to your login scripts to take effect.
  • To select the Ureka environment, type
    ur_setup
-------------------------------------------------------------------------------
*ถ้าไม่ได้ใช้อะไร ผู้เขียนแนะนำให้ลงแบบ ubuntu หรือ stand alone ไปเลย ง่ายที่สุด 
3) IRAF เพียว ๆ    ให้เลือก IRAF ให้ตรงกับเวอร์ชั่นลีนุกซ์ที่ท่านใช้งาน 32-bit หรือ 64-bit ก็ได้  ขั้นตอนติดตั้งประมาณนี้ 
ต้องเป็น ROOT ก่อน จึงจะติดตั้งได้
>mkdir /iraf
>mkdir /iraf/iraf
>mv iraf.lnux.x86.tar.gz /iraf/iraf/.
>cd /iraf/iraf
>tar -zxf iraf.lnux.x86.tar.gz
>rm iraf.lnux.x86.tar.gz
>./install

[[Keep hitting Enter for all prompts]] ติดตั้ง X11 สำหรับ IRAF 

>mkdir /iraf/x11iraf
>cd /iraf/x11iraf
>wget http://iraf.noao.edu/iraf/ftp/iraf/x11iraf/x11iraf-v2.0BETA-bin.linux.tar.gz
>tar -zxf x11iraf-v2.0BETA-bin.linux.tar.gz
>rm x11iraf-v2.0BETA-bin.linux.tar.gz
>./install

[[Keep hitting Enter for all prompts]] ติดตั้งโปรแกรมดูรูปภาพ DS9

>wget http://ds9.si.edu/archive/linux/ds9.linux.7.2.tar.gz  (เวอร์ชั่นอาจใหม่กว่านี้)
>tar -zxf ds9.linux.7.2.tar.gz
>rm ds9.linux.7.2.tar.gz
>mv ds9 /usr/local/bin/.
>cd
>wget http://www.astronomy.ohio-state.edu/~khan/iraf/iraf
>chmod u=rwx iraf
>mkdir IRAF
>cd IRAF
>mkiraf

[[Select "xgterm" as your IRAF shell when prompted]]

exit

----------------------------------------------------------------------------------------------
@^___^@ good luck everyone


Friday, April 3, 2015

howto set the script for using STARLINK package

1. download the current version of STARLINK package
2. extract all files to somewhere on your computer

3. type these commands on your terminal
export STARLINK_DIR=/home/MyUserName/star-2014A
source $STARLINK_DIR/etc/profile


Thursday, March 5, 2015

>login for using STARLINK packages

>login for  using STARLINK packages

bash
source /star-2014A/etc/profile

Tuesday, February 3, 2015

installation IRAF package for Linux 64bit

Now, I am using Linux 64bit and trying to use IRAF package as a beginner. Here are those installation method which could work properly.
Thanks information from the website and Ohio-state.edu. 
 
**Notethat: run bash shell before using IRAF .....after you have created LOGIN.CL script
the command to start is.....cl or ecl ....in terminal...it should work properly. 
 
 Credit http://www.astronomy.ohio-state.edu/~khan/iraf/iraf_step_by_step_installation_64bit
 ---------------------------------------------------------------------------------
 
= IRAF Setup on Ubuntu/Debian Linux =

This page describes how to setup IRAF on a 64-bit Ubuntu/Debian machine.
Installation of X11IRAF, DS9 and key packages are also included. 

It will be easiest if you just copy-paste the instructions one by one except 
for the parts in [[ ]].

For 32-bit installation, see -
http://www.astronomy.ohio-state.edu/~khan/iraf/iraf_step_by_step_installation

An excellent and easy alternative installation option is provided by the Ureka project -
http://ssb.stsci.edu/ureka/

- Rubab Khan
khan@astronomy.ohio-state.edu

---------------------------------------------------------------------------------------

sudo apt-get install tcsh libxss1 lib32z1 lib32ncurses5 lib32bz2-1.0 libXmu6:i386

wget ftp://iraf.noao.edu/iraf/v216/PCIX/iraf.lnux.x86_64.tar.gz

[[If the prompt does not return after 100% then hit ctrl+c and proceed]]

sudo mkdir /iraf

sudo mkdir /iraf/iraf

sudo mv iraf.lnux.x86_64.tar.gz /iraf/iraf/.

cd /iraf/iraf

sudo tar -zxf iraf.lnux.x86_64.tar.gz

sudo rm iraf.lnux.x86_64.tar.gz

sudo ./install

[[Keep hitting Enter for all prompts]]

sudo mkdir /iraf/x11iraf

cd /iraf/x11iraf

sudo wget http://iraf.noao.edu/iraf/ftp/iraf/x11iraf/x11iraf-v2.0BETA-bin.linux.tar.gz

sudo tar -zxf x11iraf-v2.0BETA-bin.linux.tar.gz

sudo rm x11iraf-v2.0BETA-bin.linux.tar.gz

sudo ./install

[[Keep hitting Enter for all prompts]]

sudo wget http://ds9.si.edu/archive/linux64/ds9.linux64.7.2.tar.gz

sudo tar -zxf ds9.linux64.7.2.tar.gz

sudo rm ds9.linux64.7.2.tar.gz

sudo mv ds9 /usr/local/bin/.

cd

wget http://www.astronomy.ohio-state.edu/~khan/iraf/iraf

sudo chmod u=rwx iraf

mkdir IRAF

cd IRAF

mkiraf

[[Select "xgterm" as your IRAF shell when prompted]]

exit

----------------------------------------------------------------------------------------------

The command ./iraf from home directory will now launch a complete IRAF session containing DS9,
xgterm and ecl, based in the IRAF direcory. Alternately, start "xgterm' (typing xgterm), 
cd into the directory where you did "mkiraf", type "ecl" for enhanced IRAF or 
"cl" for VO IRAF, and "ds9" for standalone DS9 launch. 

The following steps show how to add external packages. If you don't need extra packages, 
then you are done already.

----------------------------------------------------------------------------------------------

cd /iraf/iraf/extern

sudo ./configure

[[The next two lines will take some time to complete, even with fast internet. Be patient.]]

sudo make adccdrom ctio cfh12k esowfi mscdb mscred stsdas nfextern optic

sudo make deitab euv mem0 mtools rvsao song sqiid stecf ucsclris upsqiid xdimsum

exit

----------------------------------------------------------------------------------------------

Next time you start IRAF, the available packages will be listed.

= END =

Saturday, August 9, 2014

how to run GFORTRAN on private machine

ทุกครั้งที่ใช้งานบน machine อื่น ให้ทำการ re-compile ก่อนทุกครั้งเสมอ
**ที่สำคัญมี gfortran และหลังจากรันเสร็จแล้วให้เอาไฟล์ใหม่จากรันไปไว้ในโฟลเดอร์ดาต้าด้วย

[aips@localhost happy]$ make -f makehappy
make: `happy' is up to date.
[aips@localhost happy]$ rm *.o
[aips@localhost happy]$ !mak
make -f makehappy
gfortran -c -g -o happy.o happy.f
gfortran -c -g -o filesearch.o filesearch.f
gfortran -c -g -o stringlength.o stringlength.f
gfortran -c -g -o new_paramfile.o new_paramfile.f
gfortran -c -g -o open_intell.o open_intell.f
gfortran -c -g -o message.o message.f
gfortran -c -g -o banner.o banner.f
gfortran -c -g -o grunge.o grunge.f
gfortran -c -g -o filelength.o filelength.f
gfortran -c -g -o write_stuff.o write_stuff.f
gfortran -c -g -o numberize.o numberize.f
gfortran -c -g -o stonum.o stonum.f
gfortran -c -g -o filter.o filter.f
gfortran -c -g -o polarise.o polarise.f
gfortran -c -g -o error_calc.o error_calc.f
gfortran -c -g -o brightness.o brightness.f
gfortran -o happy happy.o filesearch.o stringlength.o new_paramfile.o open_intell.o message.o banner.o grunge.o filelength.o write_stuff.o numberize.o stonum.o filter.o polarise.o error_calc.o brightness.o

หลังจากนี้รันด้วยคำสั่ง ./happy

Sunday, May 25, 2014

How to mount NTFS fileson Centos 6.5

Today, I am trying to mount NTFS files for the Centos 6.5 system and here is the useful tool for those  who are newbies...
---------------------------------------------------------------
P.S. credit ....http://www.tuxera.com/community/ntfs-3g-download/

1)

Download

The latest stable version is ntfs-3g_ntfsprogs-2014.2.15, released on February 23, 2014.

2) 

Installation

Linux: Most distributions include and use NTFS-3G by default. Please use that one unless it’s an old version. If you wish to install NTFS-3G from the source code then make sure you have installed the basic development tools (gcc compiler, libc-dev libraries). Then type:
./configure
make
make install # or 'sudo make install' if you aren't root

Non-Linux: Please see the OS specific installation and source packages above.

3)

Usage

If there was no error during installation then the NTFS volume can be mounted in read-write mode for everybody as follows. Unmount the volume if it had already been mounted, replace /dev/sda1 and /mnt/windows, if needed.
mount -t ntfs-3g /dev/sda1 /mnt/windows
Please see the NTFS-3G Manual for more options and examples.
You can also make NTFS to be mounted during boot by adding the following line to the end of the /etc/fstab file:
/dev/sda1 /mnt/windows ntfs-3g defaults 0 0

Saturday, May 24, 2014

AIPS troubleshooting with Xterm (Centos ver.6)

I am using Centos 6.0 and just updated all the system and trying to install AIPS. I found the problem ..... /home/aips/31DEC14/SYSTEM/UNIX/XASERVERS &.....xterm command not found......

It means you have to install XTERM for  your operating system and then AIPS will work normally.


Tuesday, January 21, 2014

Ubuntu 13.10 with no effect graphic and Linux command so on

Task: Change Password For Other User Account You must login as root user, type the following command to change password for user vivek: # passwd vivek

 Install gnome-session-fallback and consider disabling the visual effects
sudo apt-get install gnome-session-fallback

Friday, December 6, 2013

Miktex 2.9+ Thai font (Sarabun PSK)+ ไม่ตัดคำ

1. เตรียมความพร้อมของระบบ
สิ่งที่จะต้องเตรียมพร้อม
     1. ระบบปฏิบัติการ Windows 98se/NT/Vista/7 (32bit และ 64bit)
     2.  MiKTeX รุ่น 2.9 ซึ่งจะต้องมี packet “XeLaTeX” หรือ “XeTeX”
           MiKTeX :: http://miktex.org/
     3. TeXstudio 2.4 ขึ้นไป
          http://sourceforge.net/projects/texstudio/files/texstudio/
     4. ชุดตัวอักษรไทย (Font)
          13 อักษรแห่งชาติ :: http://www.f0nt.com/release/13-free-fonts-from-sipa/

2. เมื่อได้แพ็กเกจตามต้องการ ติดตั้งทั้งหมดลงในคอมพิวเตอร์ ให้เลือก Miktex แบบ complete
3. ปรับแต่ง TeXstudio
      1. เปิดโปรแกรม TeXstudio จากนั้นไปที่ Option > Configure TeXstudio…
      2. จากนั้นเลือกหัวข้อ Commands ให้สังเกตที่ XeLaTeX หากไม่มีข้อความปรากฏให้ใส่
xelatex.exe -synctex=1 -interaction=nonstopmode %.tex
      3. เลือกหัวข้อ Build ใน Meta Commands เลือก Build & View เป็น Complie & View และ
เลือก Default Complier เป็น XeLaTeX
      4. ทดสอบภาษาไทย ดัง code ต่อไปนี้

% ------ Test MikTeX 2.9 + ฟอนต์ TH SarabunPSK
\documentclass[11pt,a4paper]{article}
\usepackage{xltxtra}
\XeTeXlinebreaklocale "th"
\XeTeXlinebreakskip = 0pt plus 1pt %
\setmainfont{TH SarabunPSK}
\title{ครม.สั่งหน่วยงานราชการ ใช้ 13 ฟอนต์ไทย }
\author{ใครก็ไม่รู้}
\begin{document}
\maketitle
\section{ครม.เห็นชอบให้ทุกส่วนราชการโละฟอนต์ต่างชาติ บังคับใช้ 13 ฟอนต์ไทยในงานราชการ
ระบุป้องกันละเมิดลิขสิทธิ์}
นายวัชระ กรรณิการ์ รองโฆษกประจำสำนักนายกรัฐมนตรี เปิดเผยว่า ที่ประชุม ครม.เห็นชอบให้หน่วย
งานภาครัฐทุกหน่วยดำเนินการติดตั้งฟอนต์สารบรรณและฟอนต์ อื่น ๆ ทั้งหมด จำนวน 13 ฟอนต์ ของ
สำนักงานส่งเสริมอุตสาหกรรมซอฟต์แวร์แห่งชาติ (สอซช.) หรือ SIPA และกรมทรัพย์สินทางปัญญา
เพิ่มเข้าไปในระบบปฏิบัติการ Thai OS (Thai Operating System) และใช้ฟอนต์ดังกล่าวแทน
ฟอนต์เดิม ตามที่กระทรวงเทคโนโลยีสารสนเทศและการสื่อสารเสนอ โดยให้ติดตั้งและใช้งานให้แล้วเสร็จ
ก่อนวันที่ 5 ธันวาคม 2553
ทั้งนี้ สืบเนื่องจาก ปัจจุบันส่วนราชการจำนวนมากมีการใช้ฟอนต์ที่หลากหลาย ไม่มีมาตรฐานในเอกสาร
ทางราชการ อีกทั้งยังมีหน่วยงานราชการหลายแห่งใช้มาตรฐานฟอนต์ของบริษัทเอกชนที่ผูกขาด ลิขสิทธิ์
เช่น Angsana อาจมีปัญหาเรื่องการฟ้องร้องละเมิดลิขสิทธิ์ได้ด้วยเหตุดังกล่าว จึงได้มีการพัฒนาและมี
การประกวดแข่งขันฟอนต์ ซึ่งเป็นการส่งเสริมให้เกิดการใช้ Open Source Software ที่เป็นซอฟต์แวร์
เสรีให้ส่วนราชการไทยประกาศมาตรฐานเอกสารดิจิตัลและรูปแบบ ของฟอนต์ที่ไม่ขึ้นกับระบบปฏิบัติการ
และลิขสิทธิ์ของบริษัทใด ๆ เพื่อความภาคภูมิใจในความเป็นชาติและเอกลักษณ์ของความเป็นชาติไทย
ซึ่งในขณะนี้มีฟอนต์ที่ส่วนราชการไทยสามารถเป็นเจ้าของและพร้อม
แจกจ่ายให้ กับผู้ประสงค์จะใช้งานรวม 13 ฟอนต์ ดังนี้
\end{document}
--------------------------------------------------------------------------------

These information modified from นายดรัสวิน วงศ์ปรเมษฐ์
สาขาคอมพิวเตอร์และเทคโนโลยีสารสนเทศ คณะวิทยาศาสตร์
มหาวิทยาลัยราชภัฏบุรีรัมย์. Thanks for the useful knowledge :D

TEC DATA DOES NOT COVER FULL RANGE OF CL TABLE

Check your listr and if the data are observed more than one day you need to download the IONEX files at least 2 files and put in the same fo...